With weather and other factors conspiring to keep me from working outside much, I decided to get to work building the sail.
The sail I'll be using is a balanced lug based on that outlined in Michael Storers pdracer/ozracer plans. The plans call for using poly tarp to construct the sail, with simple edge round only to build shape into it. I spent some time debating whether to use poly tarp, foot the cost for sail material, order a kit, etc..I finally settled on just using poly tarp for now. It saves me money and I'll have less invested in it in case I decide to go with a different rig later or make a major mistake.
I still wanted to try and build a nice sail though, and learn something about 'proper' sail making. So I decided to build the sail out of shaped panels like one would if using proper material. To facilitate this I plugged the sail dimensions from the plans in to an open source sail designing application called sailcut cad. With the base dimensions plugged in and other things tweaked as necessary and based off information found on the web, I was able to print out plans with all the dimensions needed to recreate the panels in the real. What you end up with is really just a bunch of X and Y coordinates for each panel, that need to be plotted out somehow onto the sail material.
Since I'm limited on space and using a large sheet of poly tarp what I did was this:
- Buy some cheap 24 inch wide brown packing paper on 50 foot rolls. I'll plot the coordinates out onto this paper to make patterns to transfer onto the poly tarp.
- Set panel width in sailcut cad to width of paper and output the panel coordinates.
- Roll out enough paper for panel being worked on, and carefully mark a line at a right angle to the edge of the paper. Measure from this line to mark you X coordinates. Measure from bottom edge of paper to mark Y coordinates. Sailcut outputs some coords as from a fixed point, others are relative to a line between two of those points. I exported the development from sailcut as DXF and brought them into a 3D/CAD package to get fixed coords for all...since plotting those is easier for me.
- Once all points are marked out and double checked, connect them with a stiff batten or straight edge as appropriate. This is tedious and takes a fair amount of time to get them all done. Carefully cut along the lines to get your pattern for the panel.
- Lay out the poly tarp and tape down the patterns, minding the weave runs along the panel appropriately. Trace out the pattern onto the tarp, I found a very fine point (like a pen) permanent marker worked perfectly.
- The patterns represent the finished size, so measure and mark from the lines for seam and hem allowance.
- Carefully cut the panels out and assemble the sail.

Ready to plot coordinates.
Finished pattern.
Several patterns together..so far so good.
Trace pattern onto tarp.
Marking seam and hem allowances.
Panel cut, added reinforcement patches.
Panels going together.
Panels sewn together, fitting reef point and other reinforcements.
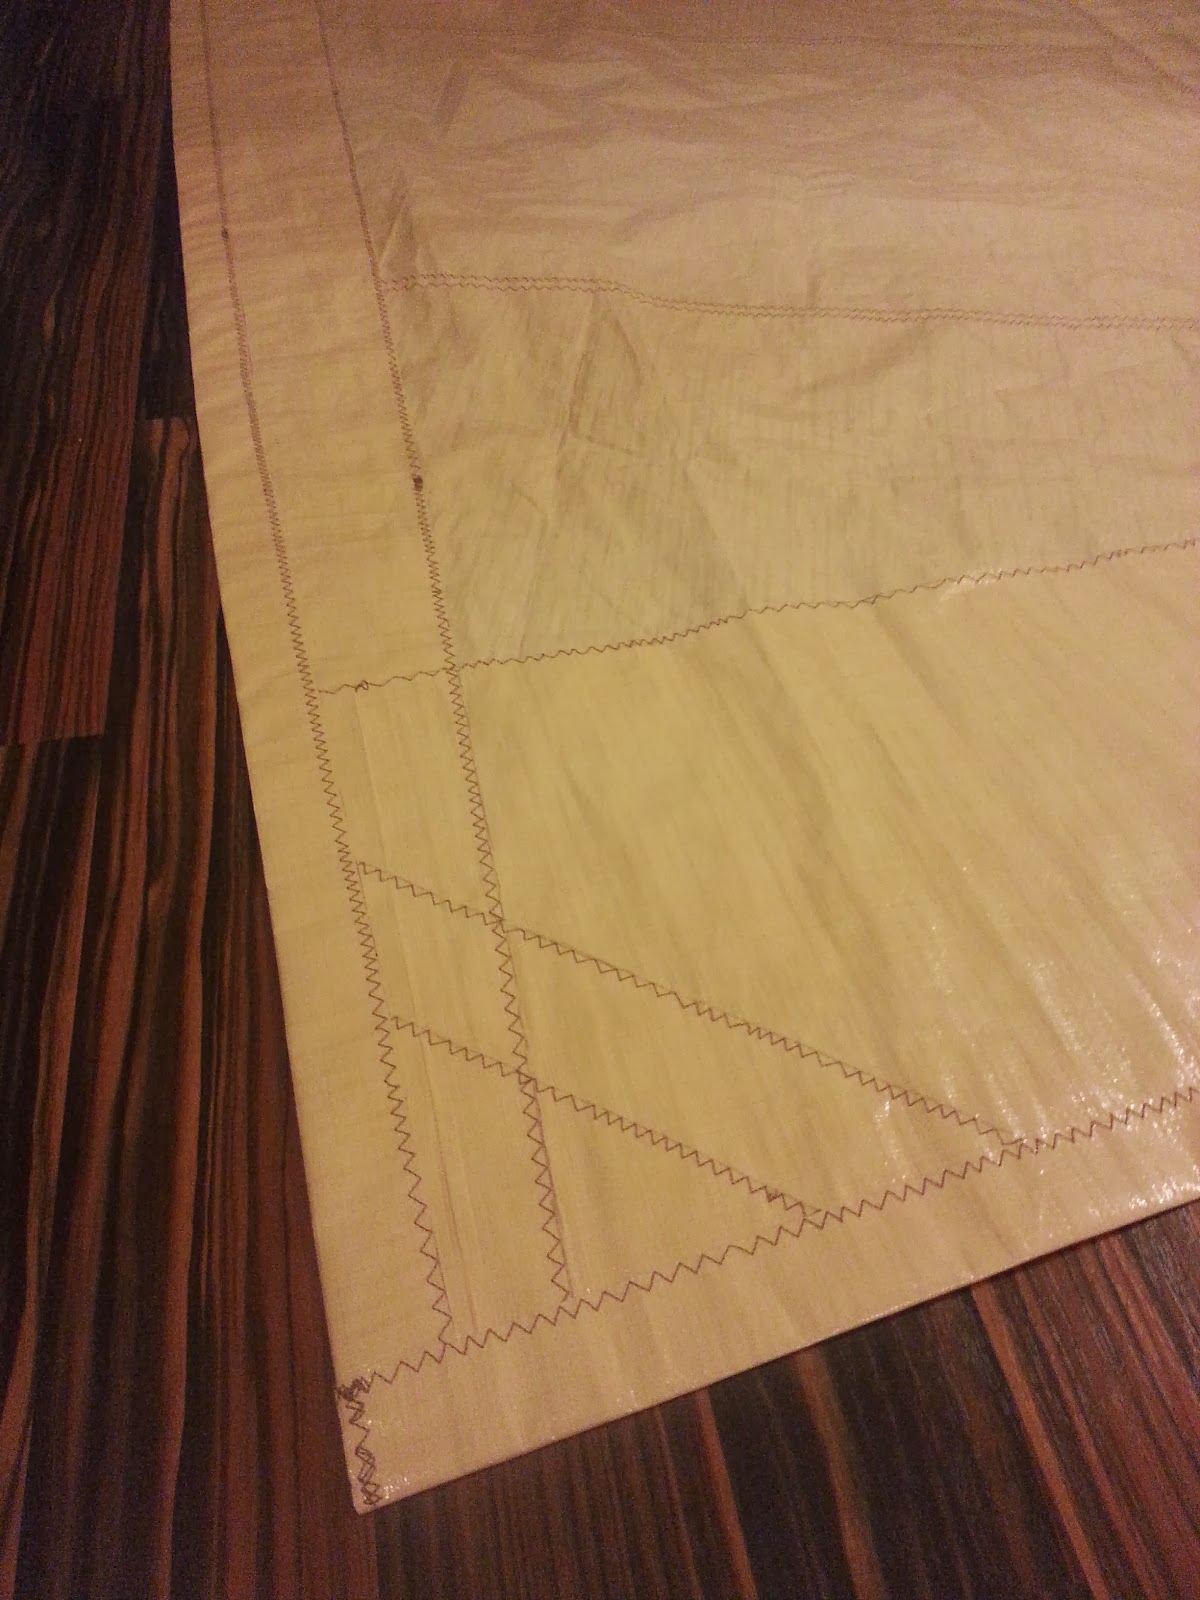
On the foot, head, and luff I cut edge to size. I then cut ~3 inch wide strips of material along the weave, folded them in half over the edge, then sewn down.
The leech had a 40mm hem allowance, which was double folded over and sewn d
Reef point reinforcments.
Sewing the round patches was awkward and difficult.
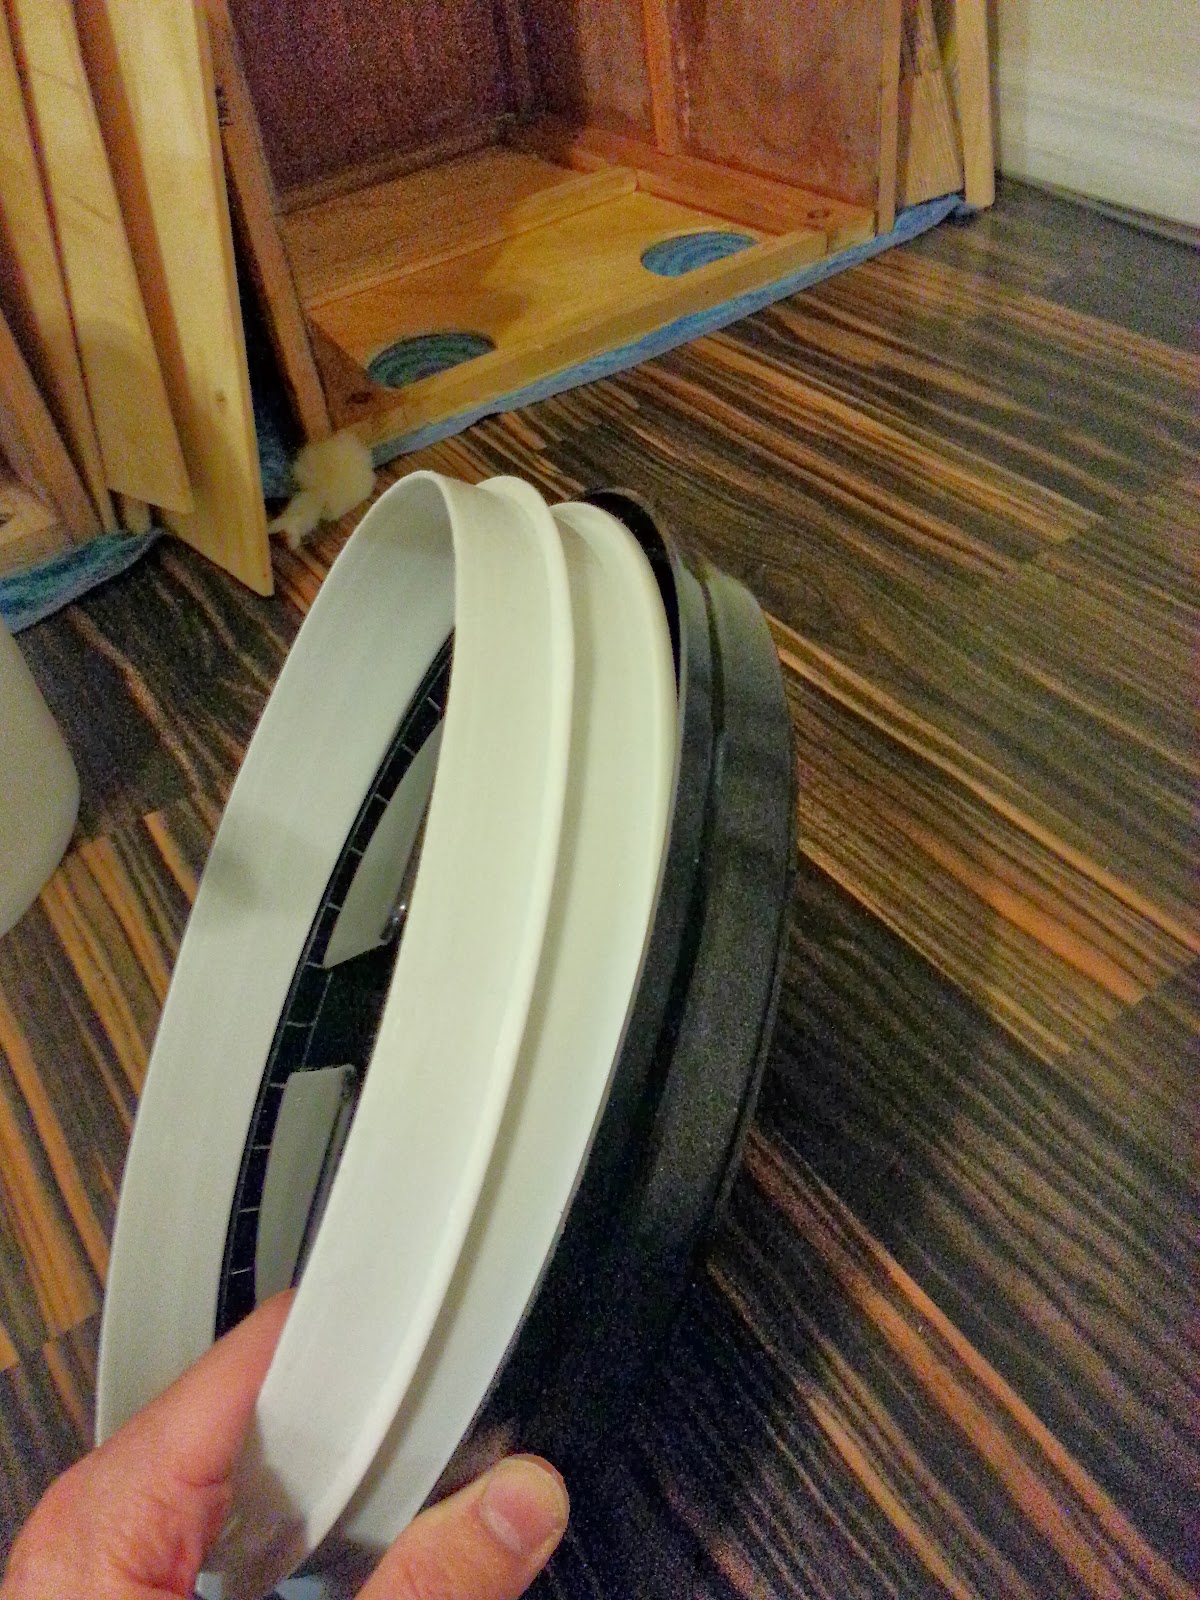
Adding grommets. I carefully cut each grommet hole (after positioning and tracing one) with a sharp utility knife. A dedicated hole cutter would be much quicker and less likely to hurt you or the sail..but
the knife works fine if your careful.
The finished product, sans the reef nettles which I haven't yet decided on.
Lot of labor, at least 40 hours or so I imagin...but very pleased with how it came out. Hopefully it performs well and holds together for a good long while. ;)